Difference between revisions of "Advanced Equipment Configuration"
imported>Dpltech |
imported>Dpltech |
||
| Line 13: | Line 13: | ||
[[File:Advancedequipconfig.png]] | [[File:Advancedequipconfig.png]] | ||
| − | ; A. Choose and apply template: Re-applying templates overwrites the settings that were changed in this page and returns them to those of the template. Values from the old templates are generally not deleted but only marked as "suppressed". This means they won't show up in reports but the data is not lost. It can be made visible by unchecking the " | + | ; A. Choose and apply template: Re-applying templates overwrites the settings that were changed in this page and returns them to those of the template. Values from the old templates are generally not deleted but only marked as "suppressed". This means they won't show up in reports but the data is not lost. It can be made visible by unchecking the "Is Suppressed" checkbox. |
; B. Fix Data: Opens the Fix data screen. | ; B. Fix Data: Opens the Fix data screen. | ||
Revision as of 13:13, 29 June 2015
This section is for advanced users only and can be used to change low level configuration of equipment.
For normal configuration see Info & Settings Tab.
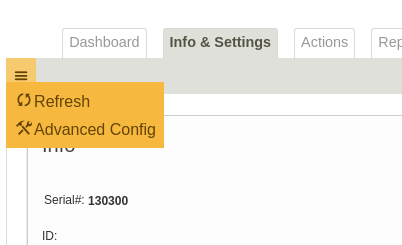
It can be accessed through the "advanced config" top left menu item on the Info & Settings Tab.
Although it is possible to change some advanced configuration settings on an individual device basis, best practice is to create configuration templates and apply them to equipment. This way configuration can be kept consistent across a fleet of similar equipment.
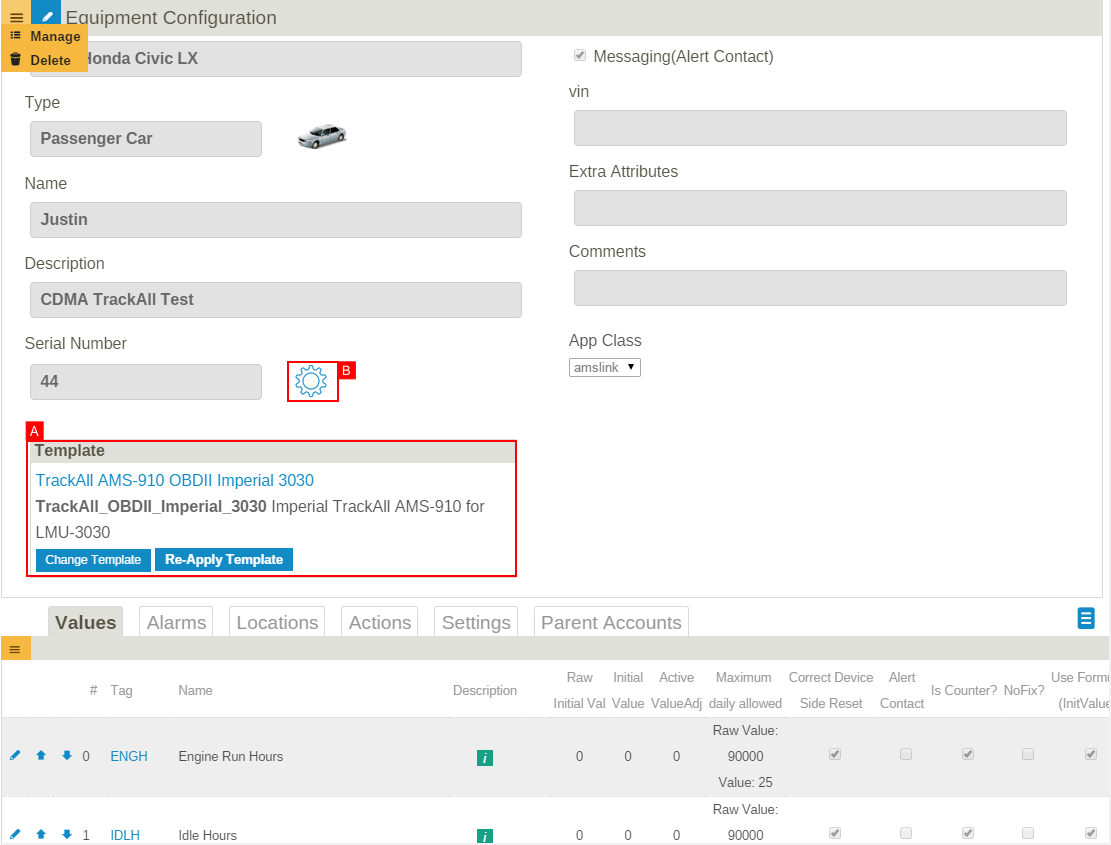
- A. Choose and apply template
- Re-applying templates overwrites the settings that were changed in this page and returns them to those of the template. Values from the old templates are generally not deleted but only marked as "suppressed". This means they won't show up in reports but the data is not lost. It can be made visible by unchecking the "Is Suppressed" checkbox.
- B. Fix Data
- Opens the Fix data screen.
The other configuration parameters modifiable here are documented in the templates section.
Fix Data Screen
This advanced feature allows for the limiting of displayed data to that which was accumulated after a specific reset point.
A device Reset Point is added when a unit is initially installed or when a reset is requested from the DPL technical support team. Once a reset point is created, a device administrator may choose to snap to or "fix" to any of the available reset points; this is called "fixing data". Fixing to a specific reset point makes the data appear as though that specific point-in-time is the beginning of the device's lifetime. Fixing data to a specific reset point is a non-destructive operation in that none of the underlying data is modified and it is always possible to "fix" to any reset point. This capability is provided as it is sometimes the case that after resetting, an administrator may wish to temporarily or permanently undo the reset operation, the fix data operation makes this possible. Furthermore, even though it may be necessary to reset a unit's data, administrators may wish to see historical (pre-reset) data for any number of reasons.
Counters are reset to zero at the reset point and data accumulation is replayed from that point on to calculate values (However this behaviour can be changed by clicking on "Toggle type" to change the reset point to one where counters continue from the last value instead of restarting from zero).
A row is highlighted in yellow if it is the current active reset point and installation has been marked confirmed.
A row is highlighted in red if it is the current active reset point and installation was not marked confirmed.
A row is highlighted in blue if it is not the current active reset point but it is the latest confirmed install point.


